Tuesday, November 30, 2010

Grilled Mahi-Mahi & Jerk-Spiced Veggies

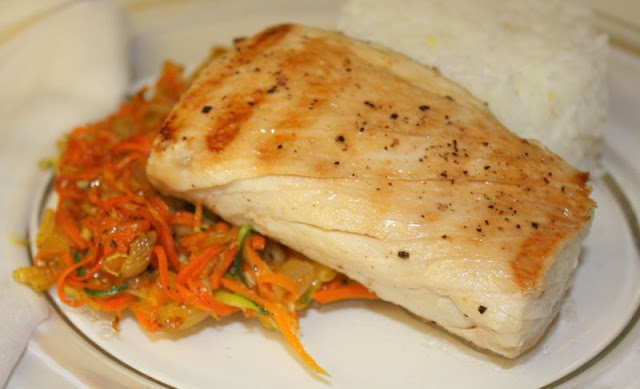
Mahi-Mahi with Jerk-Spiced Veggies
served with Jasmine Rice
So I set out to make dinner the other night & everything seemed to go wrong! First, I realized my panko bread crumbs (that I was originally planning to use) were old and stale because no one bothered to close the bag with a tie after using it. So instead of making a panko-crusted mahi-mahi, I decided I would just make it easy (I was tired!) with a drizzle of extra-virgin olive oil & lemon juice and throw it on the grill. Except for one big problemo— I was out of propane! Thankfully I have a handy-dandy Panini Grill :) 

Things didn’t turn out exactly as I had planned, but this dish still turned out yummy…especially those jerk-spiced veggies (that’s where all the flavor is!) The colors look great for a fall dish and you HAVE to invest in a Julienne Peeler if you want perfect little strings of carrot and zucchini. I picked up mine this summer at the Del Mar Fair, but you can get one too (& at a great price!) on Amazon
XOXO....little j Y
Nifty Julienne Peeler
Grilled Mahi-Mahi
3 Mahi-Mahi fillets, defrosted
1 small lemon (add rind of lemon to rice, if desired)
extra-virgin olive oil
salt & pepper

Prepare mahi-mahi fillets by drizzling (both sides) with extra-virgin olive oil, lemon juice and seasoning with salt & pepper. Add other spices or herbs, if desired. Set grill to medium-high heat and grill fish for about 7 minutes on each side, or until the fillet reaches an internal temperature of 145 degrees.

Jerk-Spiced Veggies

1 tbsp extra-virgin olive oil
3 carrots, julienne
½ of a brown onion, diced
1 zucchini, julienne
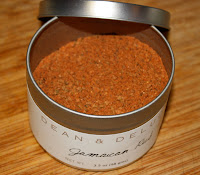
2-3 tsp Jamaican rub
salt & pepper, to taste
Julienne Carrots & Zucchini

Heat the extra-virgin olive oil in a medium saucepan on medium-high heat. Add the onion, salt, and pepper. Let the onions soften by cooking for about 5 minutes before adding in the carrots. The carrots take awhile to lose their crunch, so it helps if you let them steam in the pan by putting the lid on the saucepan. Stir frequently.

After about 15 minutes, add in the zucchini. Continue cooking until veggies soften, although I enjoy when there is still a bit of a crunch too. Season with the Jamaican spices. I used Dean & Deluca's Jamaican Jerk Rub, but any kind will do. 

*Recipe serves three, but it wouldn't hurt to add more veggies since they do wither down after being cooked.

Monday, November 29, 2010

Turkey Chili

Guilt-Free Turkey Chili
This week I wanted to focus on making healthy dinners since I apparently enjoyed my Thanksgiving dinner a little too much (according to my scale!) What better meal to have then a hearty bowl of turkey chili?

This recipe is quick, easy, and quite tasty. Use extra lean ground turkey (I like Jennie-O) to help cut back on the fat content. I know the extra lean isn't as flavorful than regular turkey, but I honestly didn't notice the difference in this dish. The turkey chili is also pretty “mild” in the spicy department. Perfect for me, but I am a wimp when it comes to really hot food! Feel free to spice it up a bit by adding more chili powder or a hot pepper :) XOXO....little j Y

Turkey Chili
Adapted from: Cooking Light Magazine, Sept 2010

1 tbsp extra virgin olive oil
1 cup red onion, diced (about ½ of an onion)
1 poblano pepper, seeded and diced
1 tsp garlic, minced
1 ¼ lb ground turkey (extra lean)
salt & pepper, to taste
1 tbsp chili powder
2 tsp dried oregano
1 tsp ground cumin
3 tbsp tomato paste
1 (14.5 oz) can of cannellini beans, rinsed & drained
1 (14.5 oz) can of diced tomatoes
1 (14.5 oz) can of diced fire roasted tomatoes
1 (32 oz) container of fat-free, low-sodium chicken broth
½ cup chopped cilantro (optional, but highly recommended)
light sour cream (optional)
low-fat cheddar cheese, shredded (optional)

*Makes about 10 cups (approximately)
*145 cals/cup; 2.4 grams fat/cup (approximately)
*Keep track of your caloric intake using WebMD's Food Calorie Calculator

Heat olive oil in a large saucepan over medium heat. Add red onion, poblano pepper, garlic, salt and pepper. Let cook for about 5 minutes. Add the turkey and cook for an additional 5-10 minutes, or until turkey is done. Use a wooden spoon to smash turkey into smaller crumb-like pieces.

Next, add the chili powder, oregano, ground cumin, tomato paste, beans, tomatoes, and chicken broth and bring to a boil. Add more salt & pepper as needed. Reduce heat to low and let simmer for 20-30 minutes. The longer you let it simmer, the better it will taste.

Step 1
Step 2
Tip: Don’t want to waste the leftover tomato paste?
Step 1: Get a square of saran wrap and place the rest of your tomato paste in the center. 
Step 2: Wrap & freeze. When ready to use, just cut off a chunk of the frozen paste.

Serve Turkey Chili with a dollop of light sour cream & a sprinkle of chopped fresh cilantro. Low-fat shredded cheddar cheese or crumbled crackers are other great additions. 

Wednesday, November 24, 2010

Give THANKS!!!

Did I mention it was an 8 POINT!?!
Venison, anyone? My Dad called me the other day with some pretty exciting news….he got his first BUCK. He has been hunting for 30+ something years back in his hometown of Olean, NY and never quite seemed to close the deal on getting a deer until this year. So now, I’ve got to clean out practically half the freezer so we can fit all the venison he’s bringing home. Then I decided I might as well do a little pantry organization while I’m at it!

Have you ever noticed that your pantry is overflowing with cans of who-knows-what that you bought (& don’t exactly remember why) since they never seem to get used? Well my pantry definitely has things in it that we probably will never use, so I figured I’d start making a little collection of those unopened canned/boxed items for someone else to enjoy.

During these hard economic times, there are definitely people struggling to put food on the table! So it’s great to know that there are resources within practically every community of San Diego to help them out. I found the most comprehensive list of every food assistance program within the county that you can refer to...the Food Assistance Directory. I used the directory to find a local place to donate my canned/boxed foods. This is also a great resource if you know of someone, or you ARE that someone that is struggling financially and need food assistance. In addition, some organizations (like Golden Share, Angel Food, & Neighborhood Distribution) offer fresh fruits, veggies, & meats in bulk and at a more affordable price (or free!), which is really great because the less-processed---the better!

Don’t have any extra food from home to bring in? Don’t worry, you can still help out! The San Diego Food Bank’s Holiday Food Drive 2010 is already under way. From now until December 31st you can either drop off non-perishable food items at your local Vons or Stater Bros., or purchase a pre-packaged brown paper bag of food at the checkout counter. Every bag is worth a different amount and the bags I saw ranged from $5-$10/bag (I bought one today!!!). Look for the red barrels near the entrance/exit to drop off your donations.

Want to help out & not even have to leave the house? You can do that too!! Donate online at Share Our Strength to help put an end to childhood hunger in America.

Give thanks this holiday season by paying it forward :) XOXO....little j Y

Tuesday, November 23, 2010

Açai Bowl with Nutty Granola

So I just couldn’t resist making another granola. I posted the Cherry-Chocolate Granola only a week ago, but already needed more! I was in the mood for an Açai Bowl this morning and I couldn’t eat it without making more granola first.

Sambazon Açai Smoothie Packs
If you haven’t already tried Sambazon's Açai Smoothie Packs, you are missing out! These handy, individualized packets are perfect for a quick breakfast smoothie or an Açai Bowl for lunch. I used to eat them ALL the time, but I think I had to take a break from buying them because they are on the pricier side (aka $5.99/4 packs + tax). So if you ever find them on sale—buy in bulk to save $$ in the long run.  And if you are ever out-and-about in SD and craving an Açai Bowl, stop in to try one at Lean and Green or Swami's Cafe, both of which are pretty gooood :) XOXO....little j Y

Nutty Granola

NUTTY GRANOLA!!!
3 cup oats
½ cup walnut pieces
1 cup slivered almonds
¼ cup sugar
½ cup (1 stick) butter, melted
2 tbsp ground flaxseed
½ tsp cinnamon
¼ cup honey (for extra drizzling~if desired)
½ cup dried apricots, diced
½ cup dried papaya, diced
½ cup dried wild blueberries

Preheat oven to 300 degrees F.

Combine all ingredients in a large bowl and mix until well coated. Spread mixture onto a greased cookie sheet. Bake for 30-35 minutes. Make sure to toss the granola every 10 minutes or so. I drizzled extra honey about halfway though the baking time for more of a crunchy result.

Açai Bowl

1 Sambazon Açai smoothie pack
10+ frozen dark sweet cherries
¼ cup orange juice
½ cup milk
handful of ice cubes
granola & fresh berries to put on top (think strawberries, blueberries, blackberries)

In a blender, combine Açai smoothie pack, cherries, oj, milk, and ice cubes. Blend until smooth. If you want a thicker consistency, cut back on the liquids (either the oj or milk). If you prefer to make a smoothie instead of a bowl, increase the amount of liquid added. Fruit juices are also great substitutions in place of the orange juice & adding a dollop of cool whip or a sorbet make it even better too. Serve Açai with granola and fresh berries.

Açai Bowl with Nutty Granola

Monday, November 22, 2010

Spinach Quiché

A friend got me hooked on making quichés a few months ago, and I have been making them practically every other week since then! I make it with a whole-wheat dough rather than a store bought version and I’m not sure if it’s any healthier but it sure does taste like it. At least it doesn’t have any additives!

If you are trying to cut back your fat intake, try making the quiché minus the crust. I haven’t had the guts to go crust-less yet, but I plan on doing so soon. You can also cut the cals by using egg whites and a low-fat cheese. I hate to make a dish so healthy, but with all the treats and goodies I’ve been eating lately I have no other choice!

In fact, I found a new way to curb my sweet tooth (thanks to watching Biggest Loser!!) and that’s Extra’s NEW Dessert Delights gum. I’ve already tried the Mint Chocolate Chip & I’m chewing a piece of Strawberry Shortcake right now HAH! They definitely don’t compare to the real thing, but what do you expect?! If they ever come up with a Snickerdoodle flavored gum I would be alllll over that :) XOXO....little j Y

Whole-Wheat Crust
1 cup whole-wheat flour
1 tsp sugar (I used Turbinado)
¾ tsp salt
3 tbsp milk
4 tbsp oil (any kind works--I used Safflower oil)

Preheat oven to 400 degrees F.
Mix dry ingredients in pie dish, then add in milk and oil. Stir until moist. Use your hands to press the dough down and up the sides of the dish. Cover with foil. Bake for 8 minutes. Remove foil and bake for an additional 5 minutes or until dough is dry. Set aside to cool until ready to use.

*Tip: Not interested in using a Whole-Wheat crust? Use the dough recipe from my French Apple Tart & just omit the sugar!

Spinach Quiché
Adapted from: Bethanny Frankel in Health magazine

1 onion, finely sliced (red onion/scallions are good choices too!)
1 tbsp extra virgin olive oil
salt
pepper
1 tbsp balsamic vinegar
5 cups fresh spinach
1 egg
3 egg whites
1 cup milk
1/3 cup feta
1/3 cup mozzarella

Reduce oven to 375 degrees F.

Spinach Quiche & Salad
Heat the olive oil in a medium-sized pan on medium-high heat. Add in the sliced onions with salt/pepper to taste and cook until browned. Add in the balsamic vinegar and continue cooking. After the onions are browned, turn off the heat and add in the spinach leaves. Toss the onions and spinach together until the spinach becomes wilted. Set aside to cool before preparing the quiché. If you are short on time, just pop it into the freezer for 5 minutes to cool.

In a small bowl, whisk the egg, egg whites, and milk together. Set aside.

Sprinkle the mozzarella onto the bottom of the whole-wheat crust. Add the cooled onions and spinach. Next, pour the egg & milk into the pie dish. Top with the feta. Bake for 40-45 minutes at 375 degrees F. Let cool 10-15 minutes before serving.

Sunday, November 21, 2010

Green Olive & Garlic Crostini

Every year my family celebrates an early Thanksgiving up in Julian. We have been going up to the cabin for as long as I can remember. Today, we made the best out of a rainy (& freezing COLD) day by keeping warm beside the fire and catching up. Of course we splurged over the main meal of the night—a big turkey dinner—but I hate to neglect the importance of having a yummy appetizer to hold us over all afternoon! So this year I made a unique Green Olive & Garlic Crostini that was surprisingly delicious…and surprisingly GARLICKY. What this spread lacks in visual appeal, it truly makes up for in flavor! I have to admit—the garlic was pretty potent and we definitely busted the mints out to cleanse our palates! I used two garlic gloves in my recipe, but I would suggest using either two small cloves or one larger clove. Having mints on-hand is also a good idea, unless you enjoy having garlic breath :) 
XOXO....little j Y
Green Olive & Garlic Crostini

Adapted from: Smitten Kitchen

1 cup green pitted olives, drained
1 cup garbanzo beans, drained
2 cups artichoke hearts, drained
2 garlic cloves (*use 1 for less potency!)
2 tbsp capers
½ cup extra-virgin olive oil
1-2 sourdough baguettes
This recipe is pretty plain & simple. Gather all ingredients into the food processor and blend until smooth. Serve immediately or refrigerate until ready to eat.

For the crostini, make slices out of the sourdough baguette. Brush both sides with olive oil & heat the bread up on the grill (that’s what I did!) or broil both sides in the oven. After the bread gets a nice golden color, take the bread off the heat and rub a garlic clove over each slice. Top with Green Olive & Garlic spread. Also try the spread on a sammy or panini as a nice substitute for mayo.
Green Olive & Garlic Crostini

Wednesday, November 17, 2010

Shrimp & Corn Bisque with Garlic Croutons

Last night I made dinner for my Grandparents. They are always having me over for dinner, so I figured it was about time I cook them dinner. I’ve had this book The Soup Bible collecting dust since I last used it during my college days at USC, so I decided to put some of those recipes to work. I’m an absolute fan of anything with shrimp, crab, or simply stated—seafood—so I thought a Shrimp & Corn Bisque (with my own alterations, of course) would work out perfectly. XOXO....little j Y

Shrimp & Corn Bisque

2 tbsp olive oil
1 onion, finely chopped (I used a Vidalia)
4 tbsp butter
2 tbsp flour
3 cups chicken broth
1 cup milk
2 cups shelled, deveined, & cooked shrimp
1 lb yellow corn (about 4 cups)
1 ½ tsp dill
½ cup light cream
salt to taste

*Note: Appropriate substitutions include using 1 ½ cups whole milk in place of the milk and light cream. I wouldn’t suggest cutting the calories out of this soup…it needs the cream to be called a bisque!

Get started by sautéing the chopped onion in a large pan with the olive oil over medium-high heat. While the onions are browning, (yes, leave them cooking until they get a little golden!) take care of the shrimp.

Boil a small saucepan of water. When the water is ready, drop the pre-defrosted shrimp in. Turn off the heat and let them cook for about 3-5 minutes. When they are done, (they will turn pinkish in color) let them cool in a colander before removing their shell or deveining them (if necessary). When cool, dice them into 3-4 pieces per shrimp.

Using a medium-sized saucepan, melt the butter. Add the flour and stir for 1 to 2 minutes. Then add in the chicken broth and milk and bring to a slow boil, stirring often. Take off the heat once it reaches a boil.

Once the onions are nicely browned, add the shrimp and corn and reduce the heat to medium-low. If you are using frozen corn, let it defrost in a colander under running water for a few minutes before adding it in. Then add in the dill. Fresh is best, but dry dill works just as well. Salt to taste. You’ll need a lot!

Next, pour the butter/flour/broth mixture into the pan with the onions/shrimp/corn and stir. Using a hand-held mixer, blend soup while making sure to break up all diced shrimp pieces. Keep the soup a little chunky or blend until smooth, based on your preference. 

Finally, stir in the cream & cook on low heat until it is ready to be served.


Garlic Croutons

1 sourdough baguette, chopped into bite-size pieces
2 tbsp butter
3-4 garlic cloves, chopped
olive oil
salt
pepper
1 tsp oregano (rosemary & thyme are also work well)

To make the croutons, start by chopping one sourdough baguette into bite-sized pieces & set aside. (If you use fresh bread, your croutons will be chewy with a slight crunch. If you have bread that’s been sitting in your pantry for a few days, the croutons will be crunchy, yet chewy when eaten with the soup.) Either way…you’re going to like them!

Heat the butter, olive oil, and chopped garlic in a pan over medium-high heat for less than 1 minute. Reduce the heat to medium & toss in the baguette chunks, making sure each piece is coated well. Add olive oil as needed. 

Season the croutons with salt, pepper, and oregano. Cook them & stir occasionally for about 20 minutes, or until golden brown.
Garlic Croutons...YUMMM
Shrimp & Corn Bisque with Garlic Croutons


Tuesday, November 16, 2010

Cherry-Chocolate Granola

Cherry-Chocolate Granola
A few months ago, I devoured the most delicious cookie from Teacake Bake Shop in the Burlingame Shopping District. The cookie was called the Jubilant Cherry and it had chunks of sweet chocolate with dried cherries. I don’t know where they got those cherries, but they were ohhh-so-good.

Since I don’t live near Burlingame to go grab myself one of these cookies, I decided to recreate it into a granola form. This way, I could enjoy it for breakfast, at lunch, or even on a dessert. So versatile! It will shock you how quick & EASY granola is to make. I don’t think I’ll ever bother buying it at the store again. Not sure how to get started? Check out the basics of granola-making by Kumiko Mitarai at Serious Eats and get creative in the kitchen with your own granola ideas!

Stay tuned for more granola recipes. This batch won't last long :) XOXO....little j Y

Cherry-Chocolate Granola

3 cups oats
1 cup walnuts, chopped
¼ cup butter, unsalted
¼ cup honey
¼ cup agave
1 tsp vanilla
1 tsp cinnamon
1 cup dried cherries, chopped
½ cup mini semi-sweet morsels (Nestle Toll House)

Preheat oven to 300 degrees F.

In a large bowl, mix together the oats, chopped walnuts, butter, honey, agave, vanilla and cinnamon. Blend ingredients together thoroughly using a spoon or your hands. Arrange the mixture in a thin layer onto a cookie sheet and bake in oven for about 30 minutes. Toss the granola every 10 minutes while it’s baking for an even golden color.


After the granola is cool, add in the dried cherries & mini morsels.

*Note: For a sweeter & more cluster-like granola (I like mine sweet!) you can drizzle the granola with honey after it has baked in the oven for 30 minutes. Then pop it back into the oven for an extra 5-10 minutes, toss it up, and let it cool.

Thursday, November 11, 2010

White Chocolate Chunk Cookie with Root Beer-Vanilla Bean Ice Cream

As the days begin to shorten, I find myself longing for one of my ultimate summer-time treats…a big ole’ Root Beer Float. So I whisked up a new spin on this old time classic & paired it with a warm gooey-oohie cookie. The base is a white chocolate chunk cookie & it’s topped off with a little semi-homemade root beer vanilla bean ice cream. The perfect little treat to ward off my cravings & a great little dessert to celebrate Veteran’s Day :) XOXO....little j Y

White Chocolate Chunk Cookie

Yield: 20 ramekin-baked cookies

What You’ll Need:
  •  2 sticks of unsalted butter, at room temp
  • 1 ½ cups light brown sugar
  •  ½ cup sugar
  • 2 eggs, at room temp
  • 2 tsp vanilla
  • 3 cups flour
  • 1 tsp baking soda
  •  ½ tsp salt
  • 8 oz white chocolate, chopped (I used Ghirardelli)

Preheat the oven to 350 degrees F.

Prepare the ramekins with a light spritz of butter spray. Set aside for later.

Start off by blending the butter and sugars together in your mixer, using the paddle attachment. Blend a few minutes, or until smooth. Add in the eggs, one at a time, and then the vanilla.

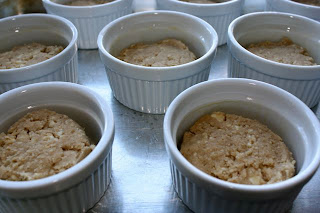
Ready for the Oven!
In a separate bowl, combine the flour, baking soda, and salt. Then add the flour mixture (about ½ cup at a time) into the wet ingredients and continue until completely mixed. Stir in the chopped white chocolate. (Side Note: The texture of the chocolate can be of your preference, being either rough of fine. You can chop the bar of chocolate with a knife, or use a food processor. I did mine with a food processor & made the chocolate pebble-sized.)

Measure out ¼ cup of the dough & drop it into your greased ramekins. Use the backside of the measuring cup to lightly press the dough down to fit the ramekin. Line the ramekins onto a baking sheet & bake in the oven for about 20 minutes.

Place ramekins on wire racks until cool.
Root Beer-Vanilla Bean Ice Cream

Betcha can’t guess what’s in this secret concoction…oh wait, I guess the name gives it away! That’s right this ice cream is just a sweet blend of your favorite root beer & vanilla bean ice cream. I used a 4:1 ratio of ice cream to root beer.

God Bless the USA!!!
To get started, mix 2 cups of ice cream with ½ cup root beer (I used A&W Root Beer) with a spoon or whisk, until it becomes a smooth & creamy. Pop it into the freezer for about 30+ minutes so it can harden. Serve immediately from the freezer (it melts quickly!)

When ready to serve, scoop some of the ice cream on top of the cooled cookie.....AND ENJOY!!

Thanks to all our Veterans & those who serve our country to protect our freedom. You are appreciated :)